Ever find yourself in need of a nook? A bedside platform upon which to stow your book? Brooklyn is known as the land of plenty in many regards: ample jobs, ample pizza, ample hills (also ample Ample Hills), but in the department of its apartments, space is not one of the things Brooklyn possesses in spades.
Okay, so you’re stuck with the hand you’ve been dealt, but when life hands you lemons, you build somethng nice with them. Just because your apartment is tiny doesn’t mean you can’t make it work for you and your stuff: reclaim your vertical space! Work with your walls and turn them into magical mystery floor-above-your-floor, and do it cheap by doing it yourself. Wanna know how? With the magic of the $4 shelf. And we’ll show you how to make it. P.S.: it’s loads sturdier than this shitty particle board-and-plastic IKEA shelf, these garbage Target shelves, and slightly cheaper to boot. Plus, nothing trumps the personal satisfaction resulting from proudly displaying your own handiwork. Nothing.
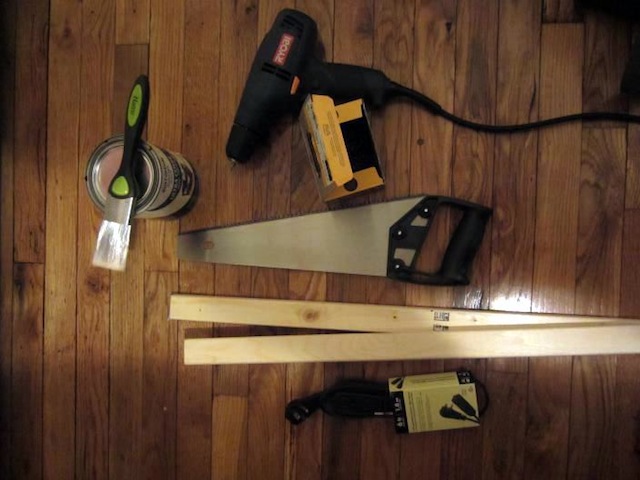
First of course, there are the tools and supplies you’ll need for this, as follows:
- materials
- wood (two 1″x3″x8’s for a small shelf)
- wood screws (#6 x 1 1/4″ and #6 x 2+”)
- tools
- saw
- power drill
- drill bit (3/32″ for pilot holes)
You might not have all of these things, in which case beg or borrow from friends or neighbors. None of the tools are too exotic though, so someone you know should have them. As for the wood, each plank of wood is under $2 from Home Depot, and the wood screws aren’t much more expensive (plus, no one ever uses up all the screws from one project with none leftover whatsoever–all I’m sayin’ is if you can thrift screws, then thrift screws). If you can’t find screws, they’re only $4 a box, so you’ll still keep this project to around a cool $10: the cost of a beer and a half at a bar.
Once you’ve got your tools, the first thing you have to do is scout out your space. In my case, it was a corner next to my bed on which I wanted to place things like radios, cell phones, books, wine glasses, etc. Corners are great candidates because they’re pretty underutilized, so you can put things there without them getting in the way and reclaim otherwise forgotten space. Plus, they’re usually a good source of studs, those 2’x4s behind the drywall that you can really screw into for a good footing.

Okay, cool: you’ve cornered your corner. You’ll need a stud, i.e. a solid plank of wood behind that wall to screw into. Fun fact: most of the space behind that wall of yours is empty space. I assumed I could find a stud at the actual meeting of drywalls, which is a good bet. Modern construction places studs 16 inches apart from one another — or at the next corner, if one so rudely interrupts the wall before it has a chance to make it 16 inches, e.g. for the sake of a window bump out.
If you can borrow a stud finder, try that out, should you care to. If your roommate is a stud finder, lock onto him or her for all relationship advice, as they’re purportedly hard to come by in this borough. Once you’ve found your studs, figure out how far apart they are and cut your wood to that size plus a smidge. Remember: it’s much easier to subtract than it is to add, at least when it comes to carpentry.
From here on out, it’s pretty straightforward: cut a bunch of planks to just more than the width of the shelf you’d like to make: these will form the base of your shelf. Then, cut up some more: 1) two pieces that the ends of all the shelf pieces will screw into and two pieces for screwing the shelf to the wall, both of which should be as long as the shelf will be deep; ten inches (10″) is a good length. Finally, 2) cut up a couple of longer pieces with ends appropriately angled for making a hypotenuse to connect the those two pieces. Okay, I said straightforward, and I swear it is: it reads a lot more complicated than it looks. These pictures will help:
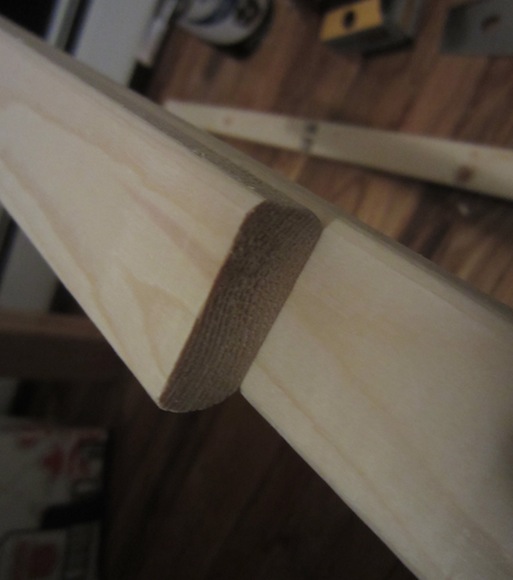
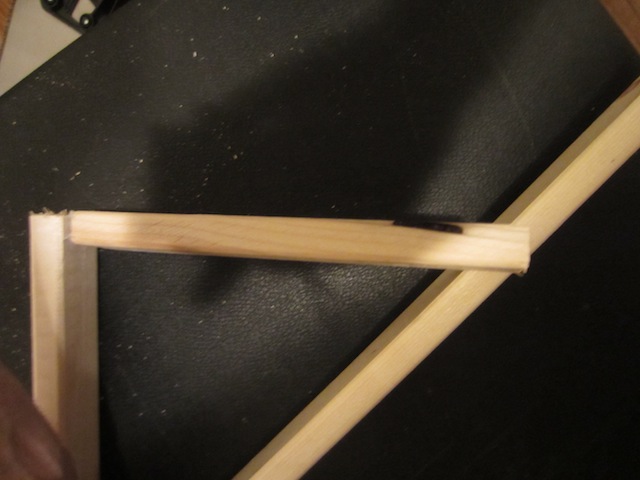
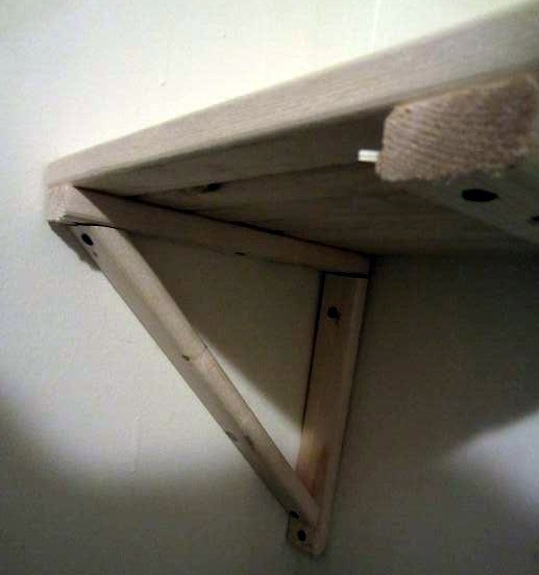
Think of the whole thing as a jigsaw puzzle, but think of how much better a jigsaw puzzle would be if you got to design the pieces: you can make them fit together however you’d like! The supports should fit together something like this:
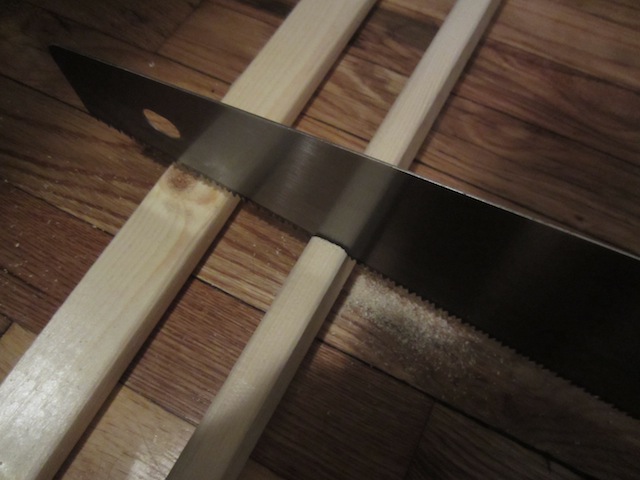
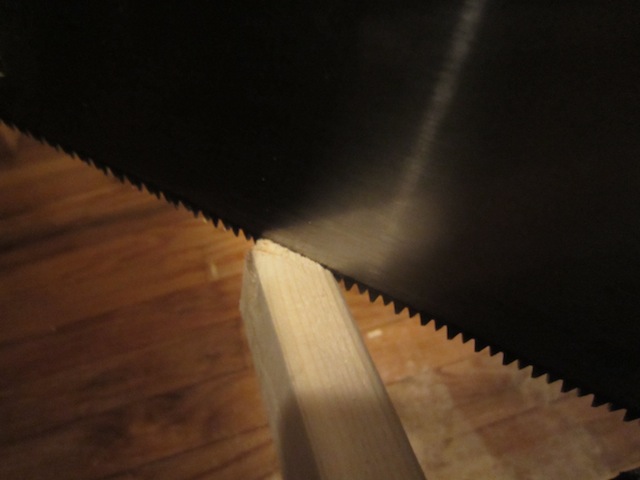
Once all your cutting’s done, it’s time for the screwing. Drill first though, to make room for the screws. Arrange everything like it should be, shelf base pieces going across laterally, ends lined up on one side, and hold the cross piece across that edge while drilling pilot holes with that 3/32″ bit, most but not all of the way through both layers of wood.
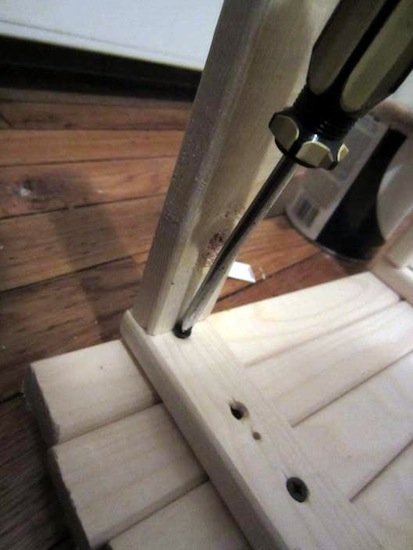
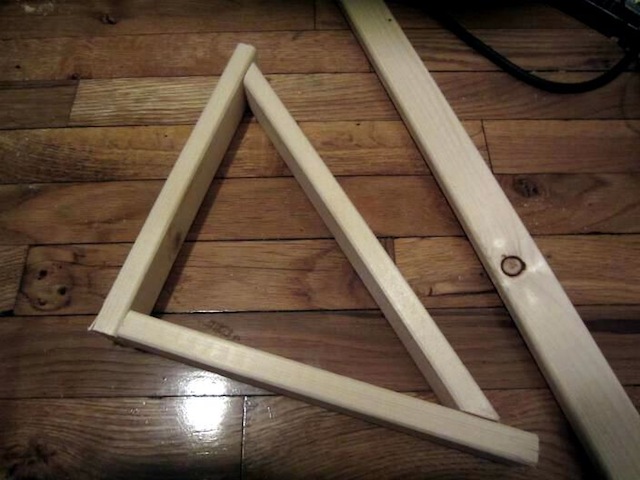
Drill small holes (we called these “pilot holes” in the trade) with the 3/32″ drill bit to make way for the screws. Screw the wall mount pieces into the wall (in at least two places per plank) before installing the supporting hypotenuse pieces. Do this by drilling and screwing them into the wall mount pieces and shelf cross pieces at their ends. After all that, you–or your shelf, rather–should be looking like this:
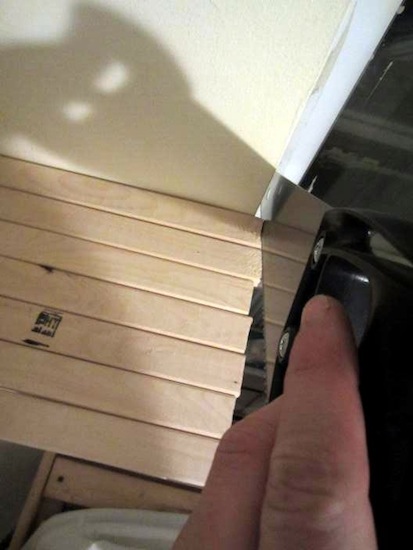
At this point, we can do a bit of cleanup, clearance permitting. Get that saw back out, and hack off the protruding ends to make the uneven even!
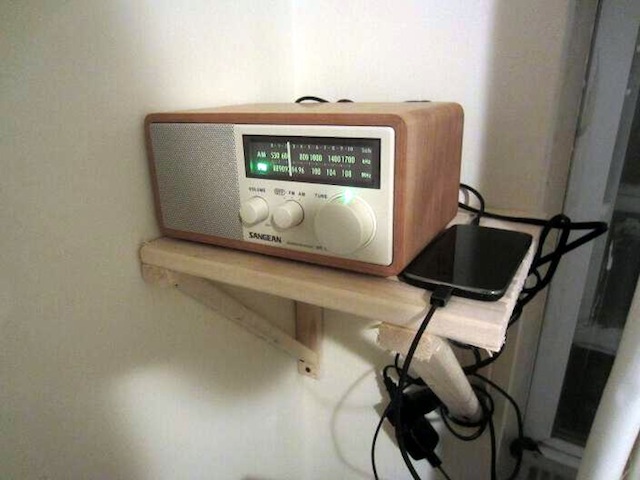
Congrats, you’ve made it! Unless you want to paint. I opted for the au naturel look because form follows function, well, laziness. Throw things on there, wrap extension cords around the supports, and hey, you’ve got a brand new shelf.
Related Articles

A genius winter cocktail: Egg Shop’s Anonymous Eggnog
Eggnog is a classic holiday staple and it’s ultra easy to whip up at home.


No gym, no problem: How to use a NYC playground as a workout center
For many of us, myself included, a gym membership or yoga subscription is a luxury we simply cannot afford. During the winter […]
Leave a Reply