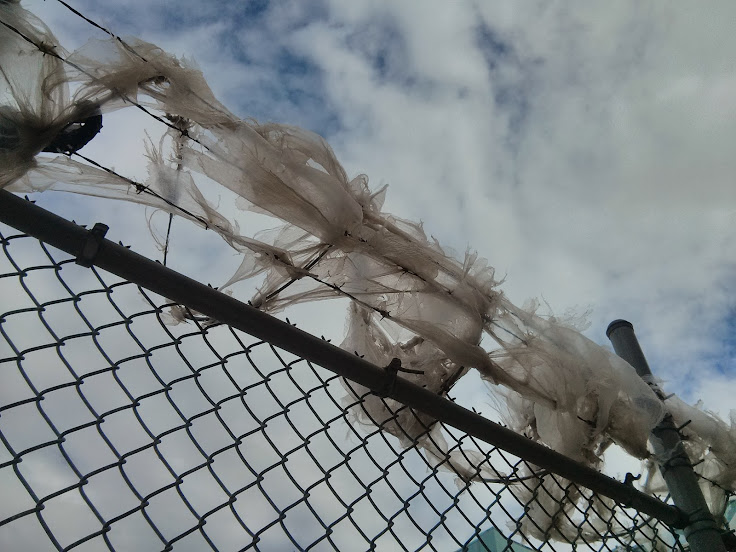
We live in an age of plenty—plenty of rich and poor people, plenty of cat videos, and plenty of plastic bags. So many plastic bags, they’re piling up in our landfills, on our barbed wire fences, and in our waterways. There’s nothing worse than strolling down to the NY Harbor during lunch break for some fresh air and scenery only to peer into the murk and see a couple of bagfish washing up on shore. Come on guys, it’s time to clean up our acts! Of course, we’d be happy to buy one of those reusable bags, but it’s hard to justify dropping a buck on a bag too cheap and generic to care about, and we’d probably just lose them anyway and buy fifteen more until we lose track of those, too, give up on the whole thing, and just revert back to our old, guilt-laden, world-killing ways.
But hold on! There’s hope yet! What if we actually made a custom, canvas tote bag of our own that we were super proud of and would love and cherish forever and ever? Sound like a tall task? Nah, it’s not too hard. Just follow our directions below and you’ll be toting around in no time!
First, you’ll need a few things:
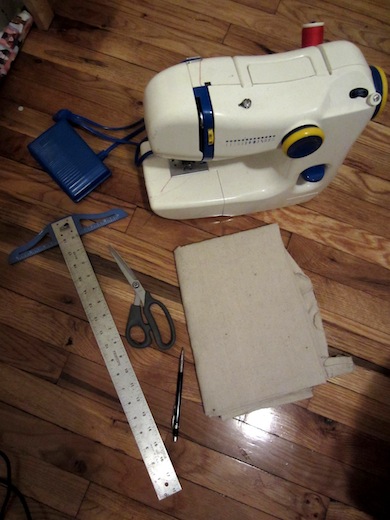
You’ll need access to a sewing maching. This one’s $70 from IKEA and will come in handy more often than you think, but if you don’t already have one and don’t want one/can’t afford one, ask a friend. Come on, this is Brooklyn: you must know someone with a sewing machine.
You’ll also need some canvas. I sourced mine from a dropcloth I had leftover from painting my walls that I got from the Home Despot. A T-square is useful also. I borrowed my roommate’s, and while it makes life easier, honestly you can eyeball everything if you’re one of those impatient adventurous, fly-by-the-seat-of-your-pants types.
I suppose you also need some confidence, persistence, and a wee little bit of time, but it’s nothing you can’t accomplish in an evening or two you would have otherwise wasted on shitty Internet television or in a crafternoon that you would have blown making some felt fascinator you’ll never wear, anyway. Okay, you ready? Let’s do it to it.
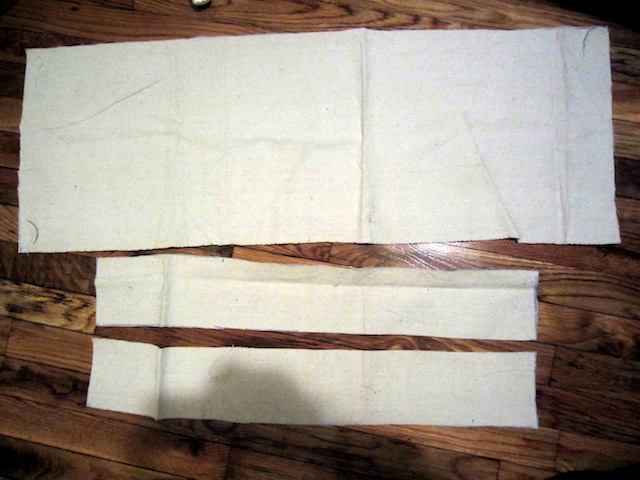
I decided that that a foot by fifteen inches seemed to be a good size for a bag, as it’s small enough to fold up nicely and be unobtrusive, but large enough to hold useful things like wine bottles, unfolded 8 ½“ x 11” cardstock and very cooperative cats. To begin, you’ll need to cut three pieces of canvas out of your material: one large rectangle that will make up the body of your bag and two long, thin rectangles that will constitute the straps of your bag.
Once you’ve got everything cut, fold and press the long, thin rectangles into shape as illustrated below (if you’ve got a clothes iron, this part is easier; if you don’t, you can always just pin or [if you’re desperate] tape things together):
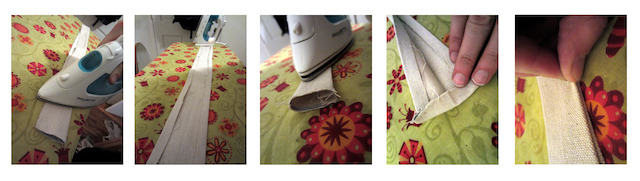
So you’re gonna take each of those thin rectangles and do the following: 1) Fold them in half. 2) Unfold them and then fold the edges over ½” and press them flat. 3) Fold again along that first crease and press everything flat. 4) Fold the ends over ½” and press everything flat again. 5) Make sure your edges are all neat and aligned. Press flat/adjust pins/tape.
Hooray, you’re halfway to strapdom, you strapping young thing. Now it’s time to put your (or your friend’s/roommate’s/ex-lover’s) sewing machine to work. In the event you’ve never had the pleasure of making the acquaintance of one of these infernal contraptions before, you’ll likely need help with the whole threading thing. YouTube is a wonderful resource, but if you want the quick-and-dirty photo montage of how you do this, look no further than below:
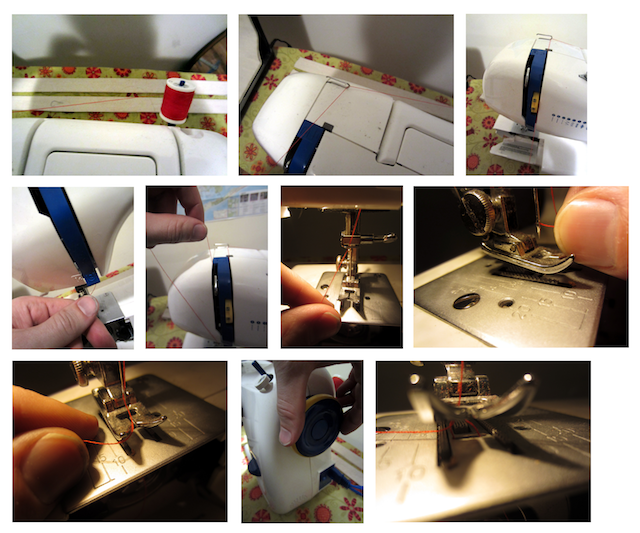
Left to right, top to bottom (like reading!): 1) Load the thread. 2) String thread through hook. 3) Bring thread down right slot in front of machine. 4) Loop around the bottom of the slit and up through the left slit. 5) Loop around eye hook at top of left slot. If it’s not there, spin that giant knob at to the right of the machine (see picture 9) clockwise until it’s there. 6) Bring thread back down left slot at front of machine, and hook through hook above needle. 7) Thread through the needle (if it’s not going through, spit helps—as in wet the thread with your filthy mouth). 8) Bring the thread between the toes of the foot. Be careful not to wrap it around the needle. 9) Spin this knobby thing clockwise while holding onto the free end of thread. You’re going fishing for another, hidden thread (from the bobbin below and inside the machine). If the bobbin’s all out of thread/the wrong color, well, go teach yourself how to wind up a new one. 10) Hooray, you’ve caught the bobbin thread! Pull it the rest of the way out, so you’re left with two free ends.
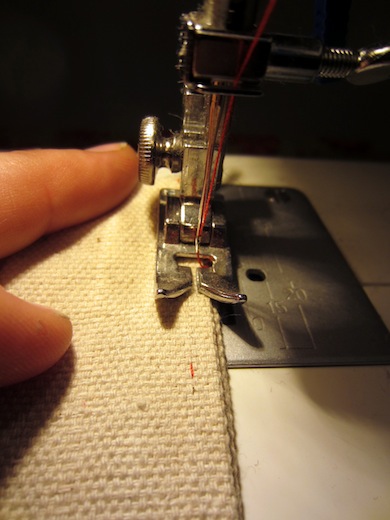
Now that you’re all set up, it’s time to sew them straps. Sew the entire length of the long dimension:
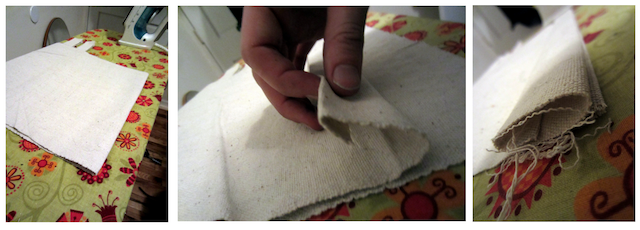
Once you’ve sewn the edges on both your straps, you can shift your focus back to the main body of your bag. Fold it flat along its length, and then fold the ends over twice (once ½”, and again 1”) and press/iron flat. Do this to both sides:
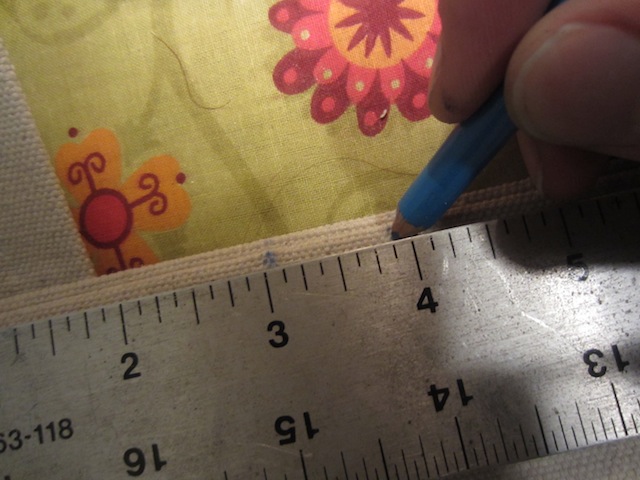
Okay, cool. Time to make a couple of marks, 3 ½” and 4 ½” from either edge on both sides of the top of the folded bag rectangle:
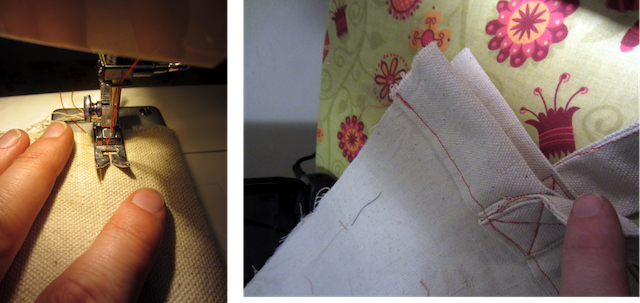
And now, we can sew the straps onto the bag. Use the marks you made to define locate the edges of the straps. Be careful to not introduce any twists into the strap. Also, make sure you’re only sewing each strap into the top edge of one and not both sides of the bag. Sew the straps into the top edge of the canvas bag with an ‘X’ inscribed inside a square for maximum strength and aesthetic quality—form follows function, you know. Get excited, because tonight is the night when two become one, baby:
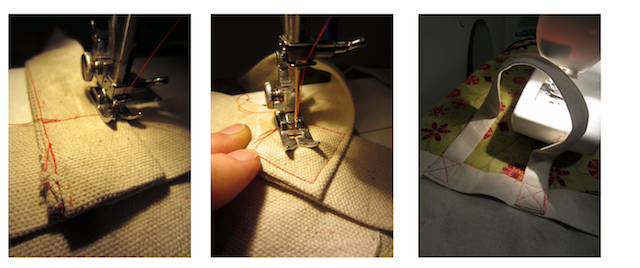
You’ve really done it now. Sew across the top (again, only through one side at a time!):
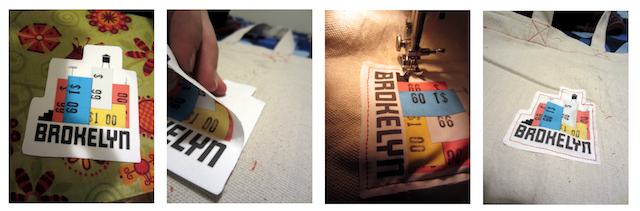
Aaaand you’re almost there! At this point, you’ve got a rectangular strip of fabric with handles on either side of it, good for lugging around long, heavy things like firewood. But it’s still not a bag. Before we make it a bag, though, you’ve got the option of making things personal. We’re gonna print things onto inkjet fabric sheets and sew them onto the outside of our bag. Heck, if you’re feeling daring, I’ve even printed directly onto canvas before with an appropriately-sized piece of material taped onto a piece of paper and passed through an inkjet printer.
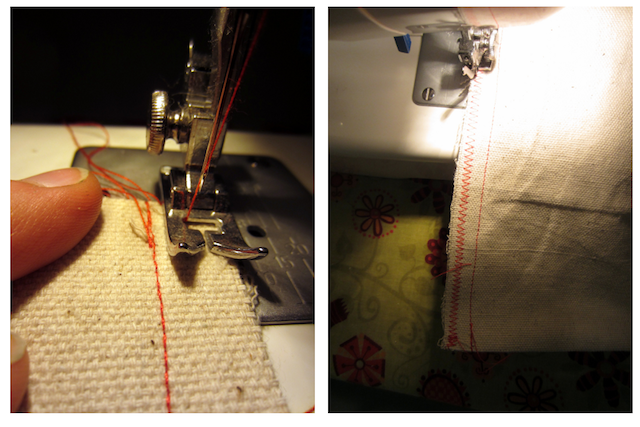
Once you’ve completed this optional-but-highly-advisable step, you’re now ready to seal the deal—and by the deal, I mean your bag. Sew up the inside edges, about 5/8” from the edges, and then zig-zag stitch the edges for good measure:
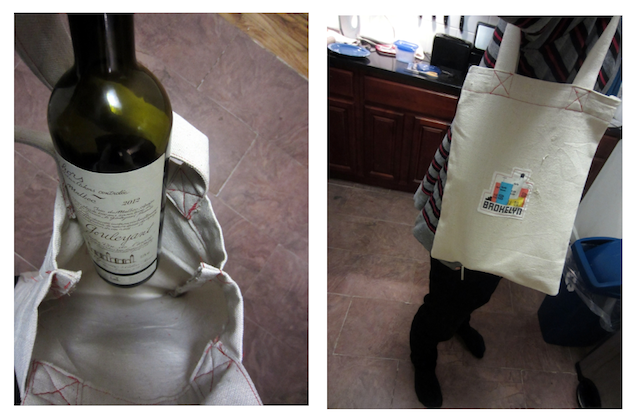
Cool man, you’re done! Invert your bag (flip it inside out), throw a bottle of wine in there, and rock that shit all over Brooklyn because you’re the coooooolest.
Related Articles

A genius winter cocktail: Egg Shop’s Anonymous Eggnog
Eggnog is a classic holiday staple and it’s ultra easy to whip up at home.

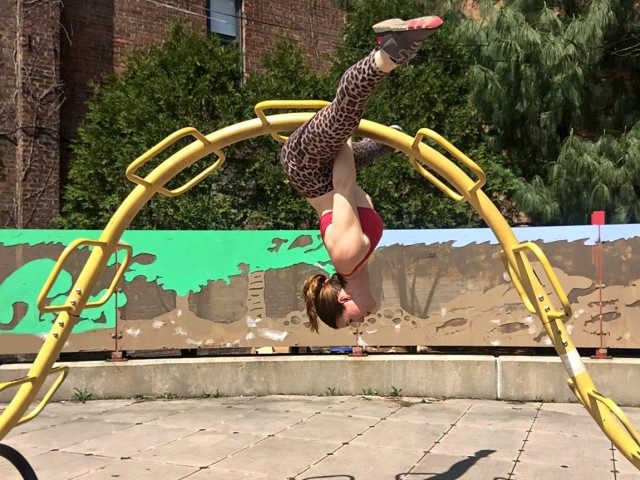
No gym, no problem: How to use a NYC playground as a workout center
For many of us, myself included, a gym membership or yoga subscription is a luxury we simply cannot afford. During the winter […]
Leave a Reply